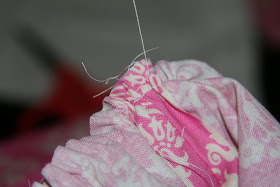
I have been talking about this little skirt for weeks! I wanted something new, something different...I mean how many twirlies can a little girl have these days. So with a little inspiration and a lot of brainstorming I figured it out. So here it goes...my best explanation.
1. You are going to need some white muslin fabric and then a pretty fabric. If you want you can use 2 coordinating fabrics for waist panel and the bubble.
Here are the measurements for a 2 year old:
waist panel fabric: 4x30 (4x15 on the fold)
muslin fabric: 10x30 (10x30 on the fold)
bubble fabric: 2 12x32 (2 12x16 on the fold)
elastic to fit the waist
sew panel and muslin into tubes using 1/2 seam (one seam down each)
sew both pieces of bubble fabric together creating very large tube
2. sew 2 basting stitches around the top and bottom of the bubble tube. Sew them at an 8th and a quarter inch from the edge.
3. Pull bobbin thread to on both stitches to gather the material (only on one side for now)
4. Fit bubble material inside out over the muslin tube (pretty sides TOGETHER) and gather and pin to the muslin tube. (use the seams as your guide to get in on straight. You can line up the seams on one side and the bubble seam and muslin fold on the other)
5. Sew the 2 tubes together where you pinned, using 1/2 inch seam. Then serge around the edge OR use a zigzag to make sure it stays!

6. Flip skirt back the other way (ugly sides together) and do the same thing at the top of the skirt, by gathering the bubble material to the muslin tube.
7. sew together as before but do not serge yet...set aside for time being.
8. turn your waist panel tube inside out and fold down the top 1/4 inch and iron

9.then fold that side down a little more than a 1/2 inch and iron (and pin if you want)
10. sew using 1/2 inch seam to make a casing for your elastic (remember to leave a little hole to thread your elastic through later.)

11. Fit waist panel over skirt (pretty sides together) and pin
12. And sew...using a little bigger than 1/2 inch to cover up the previous seam on the bubble. Now you can serge or zigzag all those pieces together.
13. Topstitch an eighth of an inch above the seam to hold all the seams the same direction
14. thread your elastic through...sew it up and You're pretty much done!!!

Exact for the matching one for the little sister....

and the embellishments...

and the matching shirt, shoes...and I havent even gotten to the bow!


 Kids activities:


 and the embellishments...


